Maybe it's the math teacher in me, or the latent CPA, but I love things that are numbered. Like these canvas bags I made last weekend - I've had the idea in my head for months and finally brought it to life.
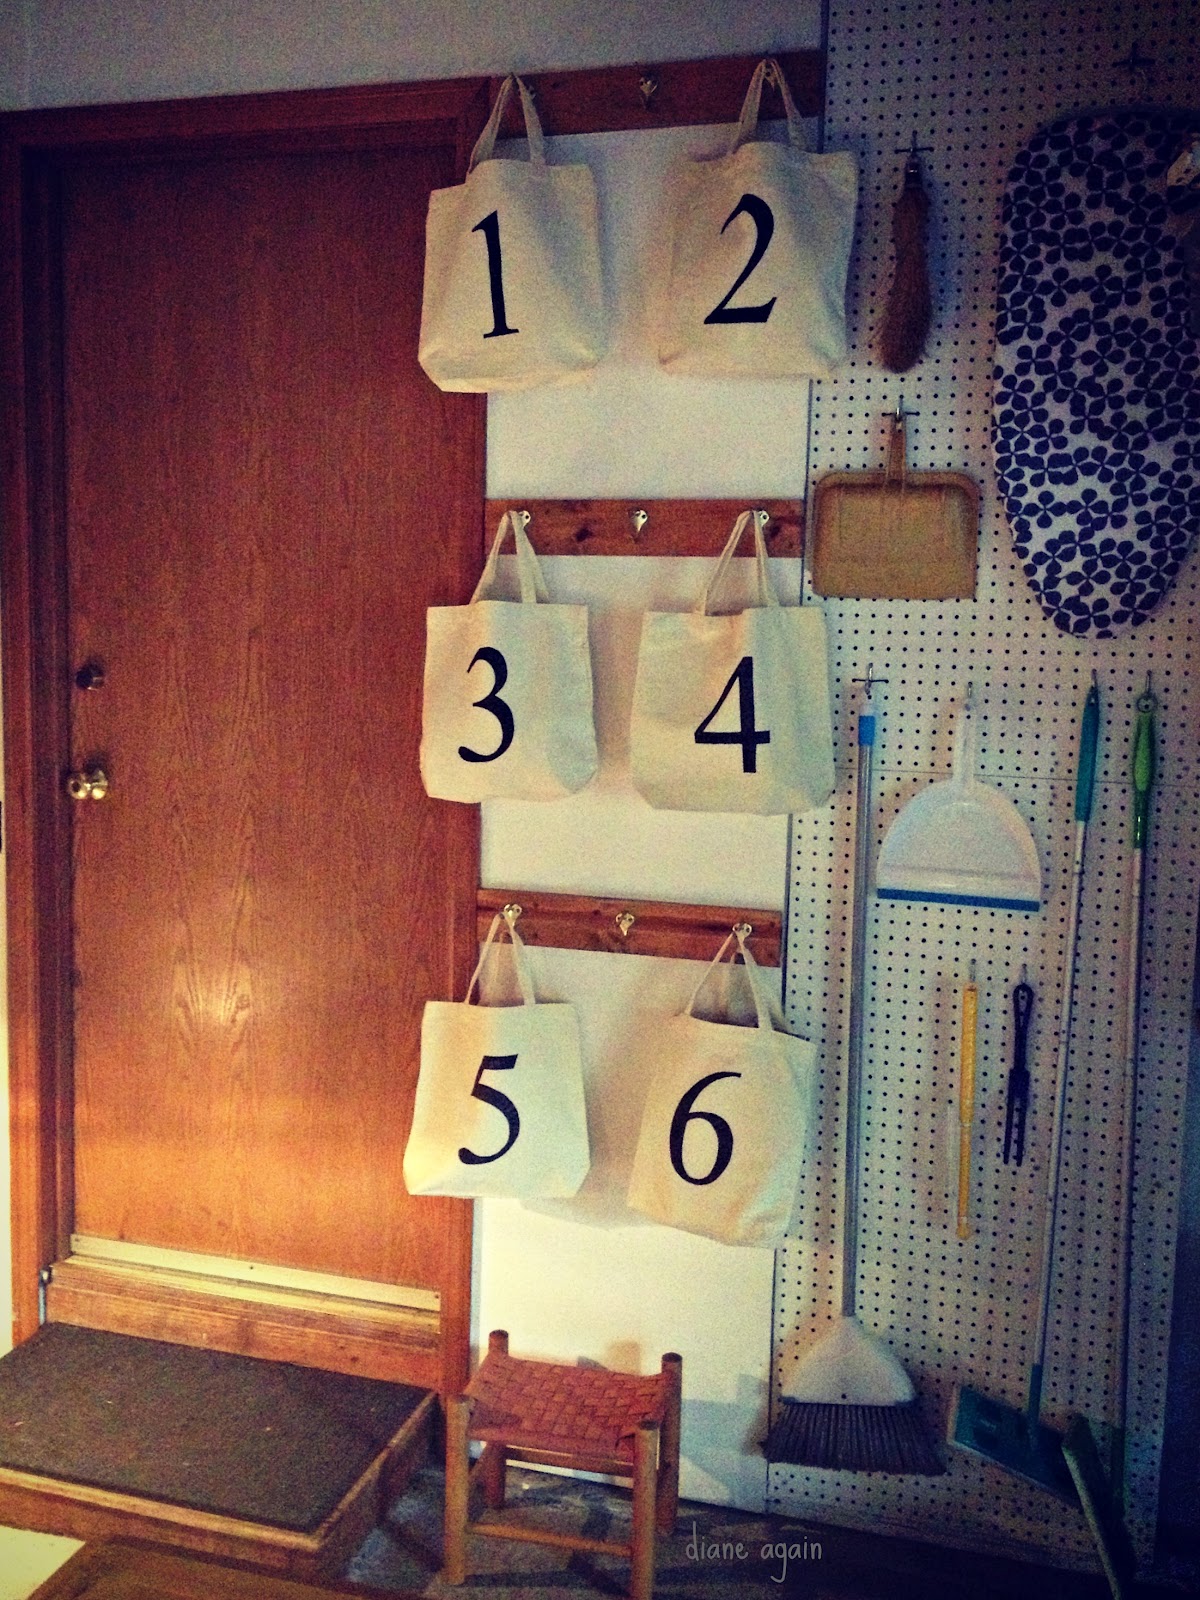
I was motivated to get them done because I finally figured out the perfect place to use these sequenced storage bags...in my ever-more-organized garage! Here by the door to my laundry room, I keep my cleaning supplies on this pegboard. But I also have a set of hooks that don't really have a purpose in life. They don't look too bad in this photo, but they can quickly become a cluttery collection of odds and ends, and I'm not okay with that.
So I decided this area was the perfect place to put my ordinal organizers to work, and here is the story of how I made them.
 |
| First, I went to Michaels and grabbed some plain off-white canvas totes. These were sold in packs of three, so I bought two packs. Just because sometimes I'm a little OCD, I washed them and ironed them first. |
 |
| Next, I turned to my old friend Microsoft Word, and drafted up my digits. After fooling around with fonts, I ended up using my tried-and-true, Times New Roman, set to size 750. Whoa now. |
 |
| I double-checked the pattern against the bag to be sure that the size would work, and I figured out a plan for centering the numbers before I went any farther down the road. Centered numbers are a big must in my book. |
 |
| When it came time to transfer the patterns onto the bags, I got all old school. Remember carbon paper? Ever even heard of carbon paper? Well, if not, it was a cool way to transfer designs like this, and I used a quickie approximation. I flipped over my number patterns and used a pencil to scribble a wide, dark line all along the edges of my numbers. |
 |
| Once the dark scribbles were on the back of the pattern, I laid the page face up on the canvas bag, perfectly centered, and then used my pencil to simply trace the outline on the front of the pattern. By pushing firmly as I traced the number, the pressure of my pencil transferred some of that dark scribbling onto the canvas, in the perfect shape of my pattern. |
 |
| Voila! How great is that?! See, kids? Sometimes the old ways have merit, even in this here new millennium Call me retro, call me vintage - heck, you can even call me a throwback. But this little trick really works. |
 |
| Now I'm ready to color in the outlines with a bold black Sharpie. Wouldn't hurt to slide an old magazine in there, to protect the back of the bag from potential bleed-through. Better safe than sorry, y'all. |
 |
| Here comes my favorite part. Grab black Sharpies -I used a variety of skinny, medium and wide tips - and color between the lines. Yes, I know I'm not normally a color-between-the-lines type, but rules are made to be broken. Go ahead, be obsessively controlling and uptight about your art, just this once. |
 |
| Anddddd install! You knew I would put them in sequential order, didn't you. I seriously thought about mixing them up, but I just couldn't bring myself to do it. Arranged like this, they just scream "Ordered pairs!!" to me, and I want to graph them on a Cartesian coordinate system. You know, y = mx + b and all that. |
 |
| Not only do they calm my mind and hush my troubled soul with their crisp sense of order and decorum, but they are so useful!Right now, I'm using them stash unsightly household necessities. Number 5 is holding extra plastic bags... |
 |
| and Number 6 is working the extra paper bags. The other numbers are holding things like the vacuum cleaner attachments, and in a note of perfect irony, my stash of extra canvas bags. Oh life, you love to mess with me, don't you. |
 |
| After using them for a few days, I came up with a little trick to keep them from flopping off the hooks when I was reaching inside: back handle on the lower hook, front handle on the top. It's the little things in life that make me happy. |
 |
| One last look. I really love how they turned out. Can you tell? |


"Just because sometimes I'm a little OCD..."
ReplyDelete:D
True confessions. :)
Delete